Guide – Tutorial – Setting Up and Programming Your New Feeder (Step-by-Step)
Guide – Tutorial – Setting Up and Programming Your New Feeder (Step-by-Step)
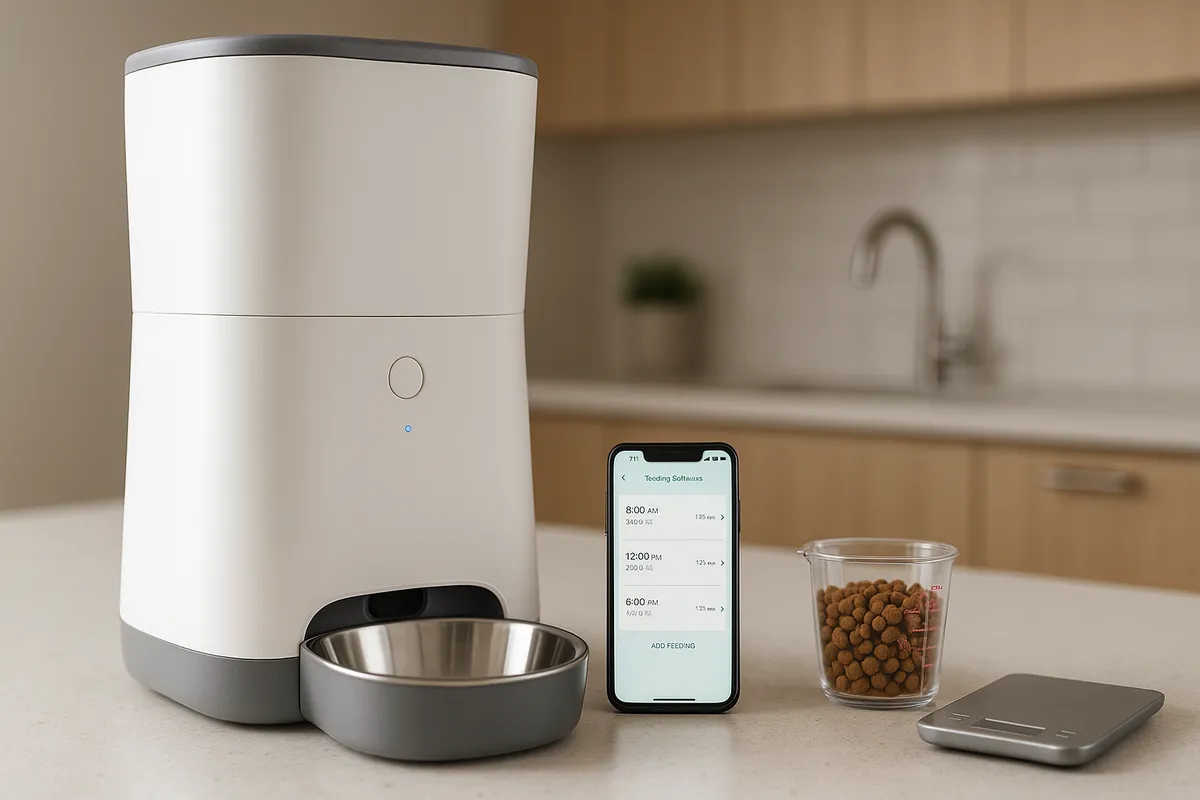
Automatic pet feeders save time, add consistency, and help busy owners maintain reliable routines. This step-by-step guide walks you through unboxing, assembly, portion calibration, scheduling, optional Wi-Fi/app setup, and ongoing care. While every brand differs slightly, the workflow below covers the common features you’ll find across most automatic pet feeders.
Note: Always review your feeder’s manual for model-specific directions and safety notes. If your pet has special dietary needs, confirm portions and schedule with your veterinarian.
What You’ll Need
- Your automatic pet feeder (feeder body, hopper, lid, bowl, desiccant if included)
- Power adapter and, if supported, backup batteries
- Your pet’s food (dry kibble is most common; see wet-food notes below)
- Measuring cup or kitchen scale (recommended for accuracy)
- A flat, stable surface near a power outlet and Wi-Fi (if using the app)
Quick Overview: The Setup Flow
- Assemble and place the feeder
- Power on and load food-contact parts after washing
- Estimate portions (daily calories → grams → “portions”)
- Calibrate output using a measuring cup or scale
- Program meal times and amounts
- (Optional) Connect to Wi-Fi and set notifications
- Test a feed and observe your pet
- Set cleaning and refill reminders
Before You Start: Safety and Placement
- Stable, level surface: Prevents tipping and mis-dispense issues.
- Away from moisture and heat: Protects electronics and food quality.
- Cable management: Route the power cord where pets cannot chew or trip.
- Lid lock & desiccant: If available, use a locking lid and desiccant pack to keep food fresh.
- Children & other pets: Enable child locks (if available) and place the feeder where other pets can’t raid it.
Step 1: Unbox and Verify Parts {#unbox-and-verify-parts”>
Lay out each component and compare with the parts list in the manual. If anything is missing or damaged, contact the seller before use.
Step 2: Wash Food-Contact Parts {#wash-food-contact-parts”>
Wash the bowl and any removable hopper or chute parts with warm soapy water. Rinse and dry completely. Do not submerge the motorized base. This step removes manufacturing residue and helps reduce odors that may put cautious pets off their first meals.
Step 3: Assemble and Place the Feeder
Attach the hopper and bowl firmly. Confirm the bowl is seated without wobble and the lid seals properly. Place the feeder where your pet normally eats—quiet, low traffic, and away from litter boxes. Check that the bowl area is clear for the dispensing path.
Step 4: Add Power and Optional Batteries
Connect the power adapter to a surge-protected outlet. If your model supports backup batteries, install fresh ones now. Battery backup keeps schedules running during brief power outages and is useful during travel.
Step 5: Calculate Starting Portions
Most automatic pet feeders define a “portion” as a fixed volume (e.g., ~5–10 g of average kibble), though this varies by model and kibble size.
- Daily intake: Identify your pet’s current daily food amount (in grams).
- Meals per day: Decide how many scheduled meals you want (2–4 is common for cats; 2–3 for many dogs).
- Per-meal target: Daily grams ÷ meals per day = grams per meal.
- Convert to portions: Grams per meal ÷ grams per portion (from your manual) ≈ number of portions.
Tip: For precision, use a kitchen scale. If you’d like a calculator, see our Portion Calculator.
Step 6: Calibrate Portion Size
Even with a manual’s estimate, kibble shape and density change the true output. Calibrate once and you’ll get consistent results.
- Place a measuring cup or scale under the chute.
- Run a manual feed of 1 portion.
- Weigh or measure the output.
- Adjust the “portion count” setting so the total per meal matches your target grams.
- Repeat until repeatable.
If your feeder supports “slow feed,” enable it for pets that gulp food.
Step 7: Program the Schedule
Enter meal times and portion counts. Keep it simple to start—e.g., 7:30 AM and 6:00 PM—then fine-tune over a week.
Scheduling principles:
- Consistency over volume: Stable timing helps digestion and reduces begging.
- Split meals: Two to four smaller meals can reduce vomiting from fast eating.
- Night feeding: If early-morning meowing is a problem, set a small pre-dawn snack.
- Travel mode: Some feeders support a fixed schedule without app access—verify before trips.
Step 8: Connect Wi-Fi and the App (Optional)
If your model includes app control:
- Install the manufacturer’s app on your phone.
- Create an account and put the feeder in pairing mode.
- Join a 2.4 GHz Wi-Fi network (most feeders don’t support 5 GHz).
- Name the feeder and enable notifications for jams, low food, or battery status.
- Share access with family members if supported.
If pairing fails, temporarily disable VPNs or private DNS and ensure Bluetooth/location permissions are granted (many apps require them for onboarding).
Step 9: Test and Observe the First Feed
Trigger a manual feed and watch how the food lands in the bowl. Confirm the amount looks right and that your pet can access the bowl comfortably. For skeptical or shy pets, stay nearby and offer reassurance. If needed, start with a smaller portion and build up.
Step 10: Set Maintenance Reminders
- Refill cadence: Based on your pet’s daily grams and hopper capacity, set calendar alerts.
- Desiccant change: Replace as recommended to limit moisture.
- Cleaning: See the cleaning section below—oil residue and crumbs build up over time.
- Battery change: Rotate batteries on a schedule if you rely on backup power.
Multi-Pet and Special Cases
Two or more pets:
- Feeders with microchip or collar-tag access help prevent food stealing.
- Consider separate feeding stations to reduce crowding and stress.
- Staggered schedules or physical barriers can help if one pet finishes quickly.
Wet or semi-moist food:
- Only certain feeders are designed for wet food; check the manual.
- Use ice packs or refrigerated trays if supported.
- Clean daily—wet food spoils faster than dry.
Large kibble or prescription diets:
- Verify chute size and motor strength for oversized kibble.
- For prescription diets, measure precisely and avoid mid-month brand switches.
Troubleshooting Quick Fixes
Feeder dispenses too little/too much
- Re-calibrate with the exact kibble you use.
- Check that the bowl is seated correctly (some models sense misalignment).
- Confirm you didn’t enable slow-feed or “meal split” by mistake.
No connection / app can’t see feeder
- Use 2.4 GHz Wi-Fi; move closer to the router for pairing.
- Disable VPN/Private Relay temporarily.
- Power-cycle feeder and phone.
- Reset and re-pair if onboarding stalls.
Jams or partial dispenses
- Empty the hopper and check for broken kibble or crumbs in the chute.
- Wipe the auger and gate; let them fully dry before reassembly.
- Avoid oily, sticky, or irregular kibble shapes if your model struggles.
Pet opens the lid
- Engage lid lock if available.
- Relocate the feeder where it’s less accessible, or add a simple barrier.
Power outage concerns
- Install backup batteries and test by unplugging briefly.
- Confirm the schedule persists without AC power.
Cleaning and Care
- Weekly wipe-down: Exterior, chute lip, and bowl area to remove oil and dust.
- Monthly deep clean: Remove hopper/bowl, wash and dry thoroughly.
- Electronics: Never submerge the base. Use a slightly damp cloth only.
- Desiccant: Replace on the manufacturer’s interval, or sooner in humid climates.
Portion Math (Worked Example)
- Target intake: 180 g/day (per your vet or current plan)
- Meals: 3 per day → 60 g per meal
- Your feeder outputs ~8 g per portion (after calibration)
- Per meal: 60 ÷ 8 = 7.5 portions → set 7–8 portions depending on tolerance
- If your pet gains weight, reduce portions by 0.5–1 per meal and re-check in two weeks.
For a quick tool, try our Portion Calculator.
Scheduling Patterns You Can Try
- Two meals: 7:30 AM, 6:00 PM (balanced day)
- Three meals: 7:00 AM, 1:00 PM, 7:00 PM (steady energy)
- Pre-dawn snack: 5:00 AM small snack + normal breakfast (reduces morning begging)
- Grazers: Multiple small drops (use slow-feed if available)
Start simple, then adjust based on appetite, activity, and weight trends.
Travel and Backup Planning
- Test the feeder for a week before travel.
- Fill the hopper fresh, install batteries, and enable app alerts.
- Ask a friend or sitter to visually check the feeder every 1–2 days for jams or spills.
- Leave written instructions with your schedule and portion numbers.
FAQs
Do automatic pet feeders work without Wi-Fi?
Yes. Most keep a local schedule. Wi-Fi mainly enables notifications, logs, and remote changes.
How accurate are “portions”?
Accuracy improves after calibration and using consistent kibble. Use a scale when possible.
Can I use wet food?
Only with feeders designed for it. Follow stricter cleaning routines and keep food chilled if recommended.
What if my pet is scared of the noise?
Start with manual micro-feeds while you’re present. Praise and treat after the sound. Many pets acclimate in a few days.
How do I prevent food stealing between pets?
Use microchip/collar-tag feeders or separate feeding zones and schedules.
Final Checklist (Print or Save)
- Parts verified and food-contact items washed
- Feeder assembled on a level surface; cable safely routed
- Power connected; backup batteries installed (if supported)
- Portion size calibrated with your kibble
- Schedule programmed and notifications enabled
- First feed tested; pet observed
- Cleaning, desiccant, and refill reminders set
Where to Go Next
- See our Feeding Schedules by Age for example routines.
- Troubleshooting specific brands? Check our brand setup sheets and FAQs in the Guides section.
- For jam fixes, cleaning walkthroughs, and portion tuning, browse our How-To library.
This tutorial is intended to help you get reliable, repeatable results from automatic pet feeders. For personalized nutrition guidance, consult your veterinarian.